Thursday, 1 August 2013

Project Regalia: A Colour Scheme Blueprint Part 3

Experiment C: Dark Green Tanks
Day 1:

I have to admit, I had a ball painting last night! This is a combined update as I had completed a couple of steps last week. My two test subjects are an old Rhino I hastily put together a couple of years ago to test a horrible batch of VGC Dark Green, and a Predator chassis I broke the sponsons off and couldn't be bothered repairing.

1) Undercoat in Vallejo Black Primer (Iwata 0.35mm) @ 20 psi

2) VMA German Grey @ 20 psi, no thinner. I applied this coat all over both tanks, leaving the bottoms pure black (though there was a little more overspray than I would have liked).

Now I got to this point, I wasn't sure if I should skip straight to edge pre-highlighting, or paint another transition coat first. Looking at my range of VMA greys (pretty much the whole range offered), I painted some test patches - I was looking for a grey that was close to the Polyurethane Grey Primer used for top-down highlights in BuyPainted's videos, since the actual primer is way too grainy to use. Here's a pic of the test patches:


As you can see, even VMA Light Grey is a fair bit darker. Oh well, I figured since I have two tanks, I'll try both methods. 

2A) VMA Medium Sea Grey @ 20psi, no thinner. This was painted at the top of the sides and top panels as the final transition coat, but only on one of two tanks. Sorry about the slightly blurry pic.


3) Edge-highlighting: VMA Light Grey @ 20psi, no thinner. I used a piece of art paper as a hand-held mask and sprayed the edges of all panels on both tanks. Again, sorry about the blurry pic, though you can actually see the difference in transition coats better in this pic than the last.


4) VMA Black @ 15psi, no thinner. This pass, I carefully sprayed the panel lines and dark edges. A bit messy, but that's ok as the colour coat and wash will tone the variations down later anyway.

4) VMA Olive Green @ 20psi, no thinner. The colour coat.
Side shots:
Three-quarter shots:

Next Steps:
Ok, next up I need to decide if I'm spraying a 2nd coat of green (I think I will), then varnish, wash, highlight (if needed), varnish, weather, varnish. 

Closing Thoughts:
First off, I have to admit that the dramatic reveal at the end when you spray colour over a greyscale tank is thoroughly enjoyable! I was very happy with how much I've improved by airbrush control, and after a couple of minor stuff ups where I was way too close to the model, I found I could accurately paint a black dot over a rivet from six inches away with almost perfect accuracy.

Secondly, I can't see much difference at all in the tone between the tank with 3 transition layers vs. the tank with 2; perhaps you can? I'll probably skip this step just for the sake of time saving moving forward.

Finally, I think I sprayed too thick - as you can see, the edges of the tanks ended up quite a white-green. Whilst this doesn't look terrible (a LOT of painters edge highlight), I just don't much like the tron look that so many vehicles end up with. The question really is; if I spray a second coat, will it diminish the pre-shading to a point where it's invisible? If I don't, will the washing and weathering process tone it down sufficiently to tie it all back together?

I'll have to sleep on it :) Overall, though, I felt the experiment has been hugely successful so far. Just for shits and giggles, I'm also planning on painting a Dark Angels logo on the top of the Rhino. It's been done to death, and I'm not convinced I'd use that particular logo for my real army, but it'll give me an opportunity to practice complex masking. I might even try the hair-spray + sea-salt technique on that or another white logo as well.

Until next time, happy hobbying :)

Brief Ecanus Update


This will be a double update as I want to keep my experimentation separate from my actual painting progress.

Last night I threw a coat of VMA Light Grey onto all of the armour pieces from a vertical angle.


And then moved on to VMA Olive Green. 


All paint was airbrushed neat (I.e. no thinner), with grey @15psi and green @20psi. 

I'm pretty happy with the progress, they are looking ok and the blend from dark to light green is actually pretty good. I think I did spray a little thick, which resulted in the paint running away from edges and leaving me with some light-green edging, but I haven't yet decided if I'm going to bother with a second coat or just move on as I'm going to have to edge highlight anyway and this might save me a step. Not sure yet.

Next up is to finish the cloaks and start with the details on the armour pieces. 

Tuesday, 30 July 2013

Ecanus begins

Not a big update today, spent way too much of my time trying to figure out why my H&S airbrush kept leaking - bubbles coming up through the paint in the cup, let go of the air-trigger and small amount of air continued coming out, etc. I never got to the bottom of it, will have to do some research before tomorrow night's painting session.

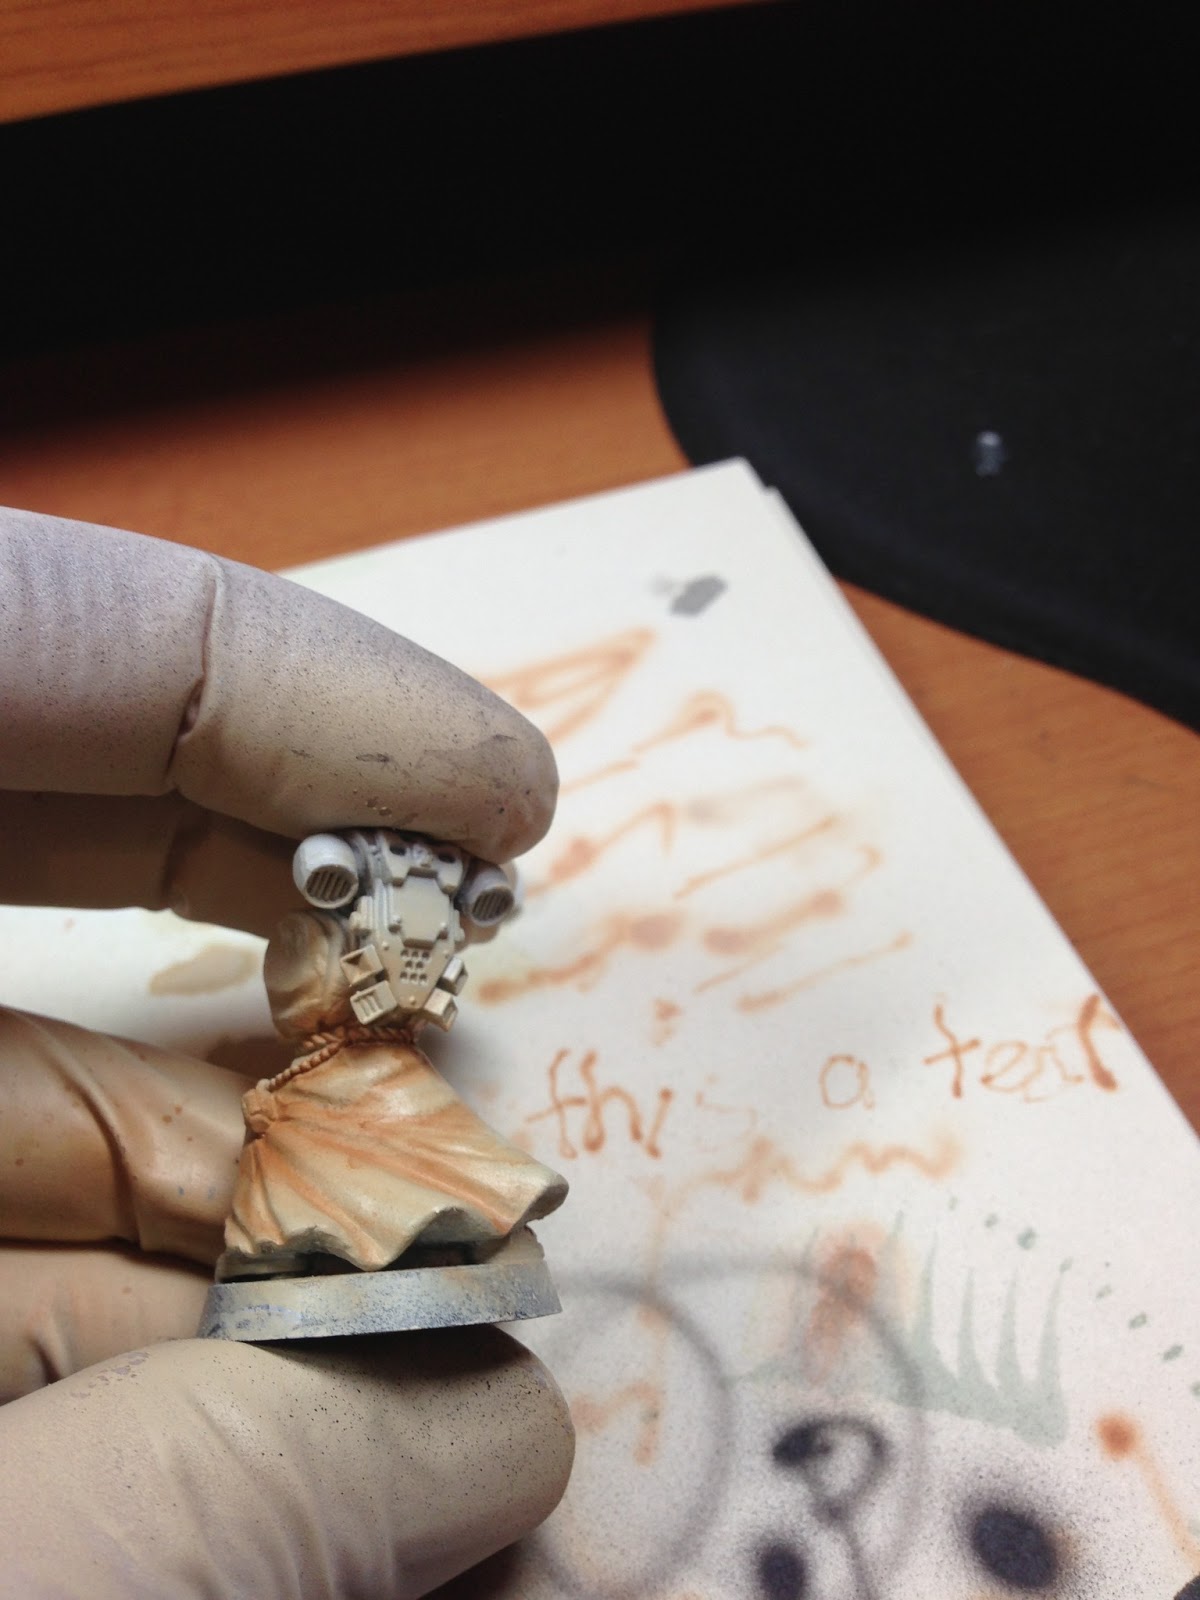
I did manage to get the first grey coat on the sides of the armour for Sq Ecanus (VMA German Grey), and the darkest browns on the cloaks (VMA Medium Camo Brown).

I also started on the test tanks, but will leave that for a separate update to avoid confusion; very happy with the first coat though.

Here's a couple of quick pics of where I'm at:


Sunday, 28 July 2013

Priming is boring!

Ive had a few hours hobby time this week, but don't feel like i got a whole lot done. This is primarily because I had to pull apart my command squad to facilitate airbrushing them, and then reprime them all. I managed to do this with only a one minor casualty - a backpack that wanted to split in half rather than at the glue seam. I also decided to use a fresh Brother Bethor for the standard bearer rather than repaint the old one so lots of scraping and filing and drilling.

After many hours of boring work, they all looked like this; an army of bits attached to corks. 


Then on to priming. Anything that had bone white cloaks got a fresh coat of Vallejo grey primer, and all the armour bits got a coat of black. I also primed two test tanks in preparation for my vehicle experiments. I finished with them looking like this.


In the background I'm also slowly painting the interior of the squad's Razorback. I'm keen to get this finished because I've got something special in mind to clearly mark it as carrying important troops.

Wednesday is now officially Pete's Painting Day, so expect another update then. Until then, happy painting!

Sunday, 21 July 2013

Project Ragalia: A colour scheme blueprint - Part 2

Managed to get a few hours painting in, thanks to my gorgeous wife for taking care of everything that needed doing while I relaxed. So, on we go with part 2 of my experiment :)

Experiment A: Bone-coloured Robes
Day 2:
After looking over the last 2 test marines, I found that I didn't like how red the Sandy Brown appeared, especially when partially coated over with Sand. As a result, I decided to try a different paint scheme on 3 of the 6 marines.

I repainted marines 1 through 3 with their Sand base coat to give me a fresh start. I then used the following sequence, all using my H&S Evo with 0.20mm needle:
1) Med Camo Brown @ 20psi, no thinner - concentrating on the deepest recesses and edges of the cloak only.


2) Light Brown @ 20psi, no thinner - leaving the darkest recesses alone, but essentially coating the rest of the cloak.


3) Light Brown + Sand 1:1 @ 20psi, no thinner - again, leaving some of the previous colour in the recesses and working my way back to the peaks of the cloak.


4) Sand @ 20psi, no thinner - now I left the folds in the cloak alone completely and very carefully painted the large flat areas and outward folds only.

5) Sand + White 1:1 @ 20psi, no thinner - painting only the edges of the outward folds and the centres of large flat areas.

        
6) White @ 20psi, no thinner - final edge highlights.


Results:
Wow! I don't really understand why I found the AB so much more controllable than the last painting day, but the end result is fantastic! Without thinning, and at 20psi, I found I could achieve a suitably fine line that I could control the blending of without too many issues at all. If anything, the only thing Id do differently is take out the Light Brown:White mix layer as the mid-tones need more contrast between layers.

Experiment A: Conclusion
I'm completely happy with the sequence I used above to paint cloaks. I'm almost certain the results will only improve with practice as I get better fine-line control, the colours are great, and removing one of the mid-tone steps will give me a good contrast between folds. I'm going to consider this experiment concluded and use this method on cloaks moving forward. Very happy bunny!

Experiment B: Dark Green Marine Armour
Day 2:
Ok, time to tackle this little frustration! I started with a black undercoat (for the third time!), and used my H&S Evo with .20mm needle.
1) German Grey @ 20psi, no thinner - sprayed a horizontal highlight. So far so good, this gave a nice smooth coat with no speckle.

2) German Grey + White + Thinner (2:3:1) @ 20psi - spraying a vertical highlight this went on smoothly, but wasn't nearly light enough. It was basically invisible...

3) Grey Primer @ 20psi, no thinner - again, spraying a vertical highlight. This coat was more controllable using the smaller AB, but again speckled. I'm beginning to think that the primer simply isn't suitable for anything other than an even coat over entire surfaces, but comparing my miniature to the screenshot I took from BuyPainted's video, I think it's as good as its going to get.


4) I did a quick little comparison of my alternatives to DA Green. In the photo below you can see the following:
- Left: GW Dark Angels Green
- Bottom: VMA Olive Green
- Right: VGC Dark Green


Ignore the top, it was DA Green but improperly mixed. You can see from the photo that Dark Green isn't quite a match to the original DA Green (hard to see from the photo, but DG seems to have less depth), but still considerably closer than Olive Green which is quite a bit darker. The consistency was different between all three, but at least this pot of DG has better coverage than the last pot, which is a relief.

The funny thing is, I laid out these samples while I was spraying my robes, and probably would have used DG with thinner had I sprayed the green armour right away. However, as they dried in the palette I found that DA Green turned a lot darker and was almost identical to Olive Green, whereas the DG essentially stayed the same colour. I decided to give Olive Green a whirl and see what happened.

5) Olive Green @ 20psi, no thinner - as I was applying a nice liberal coat evenly across the miniature, it was obvious it was going to look great. And I was right; as you can see below, the colour depth is fantastic as it transitions from dark to light, and blends excellently between tones.


Experiment B: Conclusion
Ok, I'm still disappointed that you can see speckle in the pre-highlight coat, but the method itself works perfectly. Moving forward I'll replace the Grey Primer with either a grey VMA tone, or mix a medium grey myself. This should give me a smooth tonal transition base for the Olive Green and let me get on with good results.

Day 2: Final Thoughts
I'm ready to close off both Experiment A and B at this point - I'm confident enough in both the colour scheme and method that I'll make the minor tweaks I've talked about on my next batch of actual troops. On to experiment C for the next painting session; DA vehicles. Having had a bit of time to think about it, and using the pre-highlight approach on the green armour, I think I've arrived at an approach I'll test out:
1) Prime coat in black
2) Base coat in German Grey, fading up from and leaving black at the bottom of the tank's sides.
3) Pre-shade panel lines in pure black
4) Pre-highlight edges in the medium grey mix/colour mentioned in the Green Armour technique
5) Olive Green coat
6) Figure out next steps - perhaps post-highlighting, perhaps just edge highlighting, will have to determine next steps based on how it looks.
Until next time, happy hobbying.
- Posted using BlogPress from my iPhone


Tuesday, 16 July 2013

Project Ragalia: A colour scheme blueprint - Part 1

Ok, so it's time to take a dive into figuring out the colour scheme of my army. It's going to take a fair bit of experimenting and probably some degree of frustration, so I thought I'd bring all my data and results together and present them here for anyone who cares. Who knows, maybe it'll save someone else some hassle; at the very least it'll help me document my findings so I don't forget them later :)

Based on my last post, there's a few major goals I'm working on that are fairly symbiotic in nature - I'm not only trying to figure out what paint colours to use, but how to use them effectively through an airbrush. To that end I've devised an initial set of experiments. I shall continue to post as I progress, hopefully at the end of it I'll have a paint scheme and technique I can actually use to paint my army!

Glossary:
- AB = Airbrush
- VGC = Vallejo Game Color
- VMA = Vallejo Model Air

Experiment A: Bone-coloured Robes
Goals:
  - Determine what colours to use to paint bone. Initially, the robes the DA are so fond of.
  - Determine what thinning, pressure, nozzle size is required to paint each stage with

Background:
Watching videos on YouTube, especially from BuyPainted, the plan is as follows:
  - Undercoat in Vallejo Grey Primer
  - Base coat with VMA Sand (Ivory)
  - Using an AB, build a blended shadow colour in the folds of the cloak with VMA Sandy Brown
  - Using an AB, build first level of base\highlights with VMA Sand (Ivory)
  - Using an AB, build second level of highlights with VMA Sand (Ivory) : White 50:50

From the videos, the shadows are achieved with a single fine stroke from the airbrush very close to the model directly into the folds of the cloak. Looks very difficult.

Day 1:
Ok, so I started by throwing caution to the wind and starting with the Bolter Marine from Command Squad Ecanus...after undercoating and base-coating in Sand, I went in with the airbrush at 20psi, loaded it up with Sandy Brown, and promptly coated the entire cloak in the shadow colour in one big mess. Result: Fail!

Clearly I'm going to need to tweak something...after getting some vague advice from BuyPainted (i.e. he keeps his pressure constant but thins his paint to the correct consistency for the task at hand, although he didn't indicate what that pressure might be or a good thinning ratio to work from).

It's time to experiment! I painted 6 older metal Dark Angels Marines with Robes as follows:
1) Grey Primer undercoat, applied with my 0.35mm Iwata AB
2) Sand base coat, applied with my 0.20mm H&S Evo AB @ 20psi with no thinner

Here's the line-up prior to the next stage, you can see the identifying numbers on their base:

3) I then proceeded to paint the Sandy Brown shadows on each marine, changing my pressure and thinning each time to try to find the right balance. All thinning was achieved via Vallejo's Airbrush Thinner (new formula) and mixed directly in the cup with a crappy old brush (I need to get myself a mini spatula!). All stated ratios are paint : thinner, and I used my H&S Evo with 0.20mm nozzle

The results were as follows:
   - I) 1:10 paint @ 15 psi - basically came out as a wash, blowing the paint around horribly, pooling, and the colour itself wasn't nearly deep enough. More like a really difficult to control tint, if anything. You can also see where I used my finger to remove the darker colour on the raised sections of the robe - a process I feel would have been far more effective had I bothered to wait until the base coat was completely dry...


   - II) 1:10 paint @ 10 psi - still way too thin, still went on terribly, couldn't even get a fine-line on paper with this mix.


   - III) 1:5 paint @ 10 psi - this provided a slightly better result, producing a good broad tint that didn't overpower the underlying colour too much. The problem was that it was still too thin to get a fine line.


    - IV) 3:10 paint @ 10 psi - this mix was far more controllable, allowing a much tighter line, but still too thin to prevent pooling and spatter when AB up close and personal to get better line control.


   - V) 2:5 paint @ 10 psi - I felt that this level of thinner was pretty much perfect. It allowed me to start to get fine lines whilst providing broad enough coverage to achieve a decently smooth blend.


   - VI) 2:5 paint @ 5 psi - just for shits and giggles, I lowered the pressure again. This gave me really, really tight control over the lines where I felt the only limiting factor was my skill at knowing where the paint is about to come out of the brush before I hit the button.


Next Steps:
Still a fair way to go on a final blueprint for bone coloured robes. The next step is to go over marines V and VI with Sand to bring back out the base colour on the raised sections, before proceeding to the highlighting stages. I'll start with the same ratios and pressure settings of 2:5 and 7.5 psi, and if I can't find a good balance between the two practice marines I'll redo the other 4 based on what worked for Sandy Brown to give me more troops to practice highlighting on.

Closing Thoughts:
As far as I'm concerned, the experiment was successful at delivering a workable solution - if I mix my Sandy Brown layer at 2:5, and run between 5 and 10 psi, I get a controllable and fine line. I think the only thing that will improve this now is practice and steady and fast hands, and improved AB accuracy.

Experiment B: Dark Green Marine Armour
Goals:
  - Determine which paints to use to deliver a fairly close match to the original Dark Angels Green scheme I was using
  - Determine what thinning, pressure, nozzle size is required to paint each stage with

Background:
Again, from BuyPainted, my plan is as follows:
  - Undercoat in Vallejo Black Primer
  - Apply a horizontal highlight in Grey Primer
  - Apply a top-down highlight in White Primer
  - Base coat with VMA Olive Green (?)
  - Highlight (unknown colour), again using the top-down zenithal highlighting method

I've never used zenithal highlighting, and I'm keen to see how effective the pre-highlight stage turns out to be on the base green colour. Note that I'm not convinced that the suggested VMA Olive Green is going to deliver the right tone I'm looking for, but I won't know until I paint it on the marine and see for myself. The other alternative is VGC Dark Green, which is Vallejo's answer to the older Citadel Dark Angels Green. I've had major issues with coverage of this colour in the past (as recorded on my blog), but I've now got 2 more pots of the same colour from two different vendors in the hope I just got a bad pot. So, grabbing a spare marine (I have surprisingly few "spare" marines), off we go on another experiment.

Day 1:
Right, so, we undercoat black, then just spray some grey from the sides right? If only...
1) Undercoat in Vallejo Black Primer (Iwata 0.35mm) @ 20 psi - check
2) Horizontal highlight in Vallejo Grey Primer (Iwata 0.35mm) @ 20 psi - FAIL!

Here you can see the result - spraying from about 6" away produced a really dusty, crappy, orange peel effect with bright flecks of colour for good measure. Yuck! 


Take 2...
1) Undercoat in Vallejo Black Primer (Iwata 0.35mm) @ 20 psi - check
2) Horizontal highlight in Vallejo Grey Primer (Iwata 0.35mm) @ 15 psi - FAIL AGAIN!

Seriously, twice in a row? Same result too...


Next Steps:
After I finish wanting to hit things, I plan to try two other methods to get what I thought would be a darn simple coat of grey paint:
a) Try it at 10 psi, up closer so I can control coverage
b) Try using VMA German Grey instead. I know this sounds odd, but I took a screenshot of BuyPainted's video at the point where he held up the marine with grey horizontal highlights and while he said he used Grey Primer, it looks much darker than that to me. Perhaps a thinned VMA colour will help with the orange peel too, who knows? I guess I will after I experiment :)

Closing Thoughts:
The less said, the better. I expected to struggle with where the paint went if anything, certainly didn't expect to have to struggle to get an even coat on...

Experiment C: Dark Green Tanks
Goals:
  - Determine which paints to use to deliver a nicely shaded and highlighted tank in the same Dark Angels green scheme as my marines (which may not necessarily use the same paints)
  - Determine what thinning, pressure, nozzle size is required to paint each stage with

Background:
So there's a few different ideas rattling around in my head, and I'm not sure how to proceed as yet. It's listed on this blog post because I've started painting the interior of Command Squad Ecanus' Razorback in preparation for a coat of paint, and I need a reasonable method planned out pretty soon as a result.

Firstly, I plan to use my poor old Rhino from previous posts as a testing bed for my ideas. Just need to dig it out of the graveyard and give it a good solid black undercoat.

Here's some thoughts on how I might approach it, still yet to solidify them:
Method A: Pre-shading \ Pre-highlighting - I've seen a bunch of videos that start with a grey primer coat, then pre-shade panel lines with black and pre-highlight edges with white. Then they spray a number of light coats of the base colour and end up with all the hard work pretty much done. The thing is, I'm not certain how I can apply this method when my base coat is black already...maybe I'll just try the edge highlighting in grey and go from there?

Method B: Standard base coat, shade & highlight - Alternatively, I could simply start from a black undercoat, apply an even coat of green, then use a darker mix for panel lines and shading, and a lighter mix for highlights.

Method C: This idea integrates with either A or B, so will probably be included no matter what...either paint the whole model in a slightly darker shade of the base colour, then lots of thin light coats of the base colour, leaving a smooth transition from the bottom of the tank side to the top (where it's completely covered with base colour), or paint the whole tank in the base colour and manually paint in the transition with the darker colour.

As you can see, there's a few permutations of those thoughts. Some time in the next few sessions I'll probably just pick a combo and give it a go on the test tank, and document my findings. Not sure what else to do but play around with the ideas until I'm happy.

Well, that's it from me for now. A long post as a welcome change from a year of no posts. Hope someone in the ether finds it at least mildly interesting :)