Tuesday, 29 May 2012

An experiment: Pre-shading Dark Angels

So, after looking around the net at various airbrushing techniques, I stumbled across the idea of pre-shading. The concept is to paint your shadows (panel lines, recesses, etc.) onto a vehicle in a darker shade of the undercoat before mist-coating in your chosen colour. Assuming you apply a number of thin layers of base-coat, your pre-shading should just be visible as a darker shade of your base-coat, essentially shading your vehicle very rapidly and effectively.

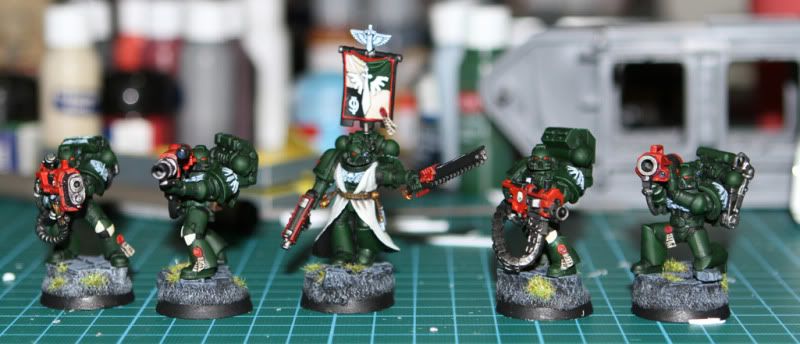
Great concept, but how the heck do I do it with Dark Angels Green? I need something that's going to match the way I paint my troops, else the vehicles just won't look contiguous with the rest of the army. My normal colour process for the armour on Dark Angel troops is as follows:
1) Black undercoat
2) 1:1 mix of Black and Dark Angels Green
3) pure Dark Angels Green, leaving the previous colour in the recesses
4) highlight with Snot Green (blend, edge highlights, etc. - depends on the detail-level I want)

So, given I start with a black undercoat, it's kinda difficult to paint a darker colour to pre-shade on a vehicle...What happens if I use a medium grey undercoat? That solves the pre-shade problem, but will it result in a brighter Dark Angels Green than my normal troops? Is there an alternative that will work instead?

Time for an experiment :)

I've used an old Rhino as a test vehicle, primarily because it has non-Chapter doors glued on and I've decided all of my vehicles will have DA doors from FW. I intend to compare the following:
1) A pre-shade using medium grey as the undercoat colour
2) Use my troops process on the vehicle to compare results

Without further ado, here's where I got to in a few hours of messing around last night. All paint is Vallejo Game Color and thinned with Windex. Numbers in brackets are droplet count for mixing.

1) Base-coat Cold Grey:Windex (60:20) at 20psi
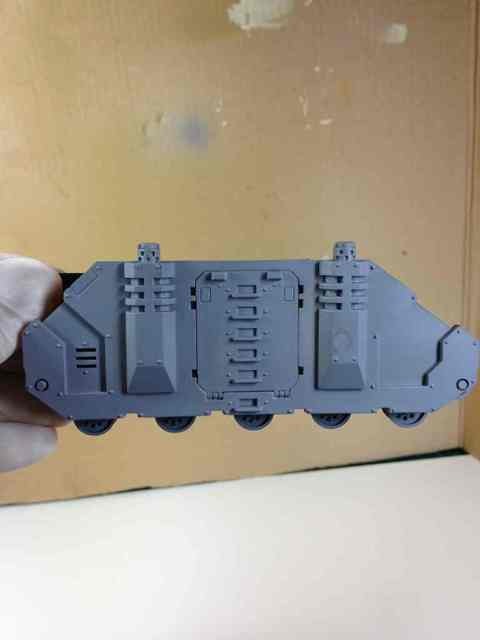


2) Pre-shade Black:Windex (60:20) at 5psi
I noted here that pressure was too high at 10psi so I lowered it to 5, but still found it too high (it was blowing wet paint around). Not sure if this is a pressure issue or the paint was too thin, will need to research.


3) Light coat of Dark Green:Windex (60:15) at 15psi
I noted here the paint was waaaaay too thin!


4) Light coat of Dark Green:Windex (60:5) at 15psi
I noted here it was a little better, maybe even a bit too thick, but I didn't wait long enough between coats (I'm impatient!)


This is where I left it so it had a chance to dry completely. It probably needs two more really light coats, probably thinned somewhere between the two previous tests. Will post updates as I progress.

-----------------------------

In the other corner, the progress is a lot harder to see, and not as far down the path. I managed to get one coat of the darker green colour over a black undercoat. The colour I mixed was absolutely perfect to match the first stage I use on my troops, so I'm pretty happy, but it needs a second coat of this mix before I proceed to DA Green.

You can't really see the colour from the photo, but here it is anyway :P


All in all, a good night of experimentation, certainly learned a little about my airbrush. You can see from the last photo I was also messing around with thin lines - I am far from perfecting this, but I at least have a starting point of knowledge to build on now (5psi, about half an inch or so from the object renders a line about double the thickness of a felt tip pen, which is good for a start).


Tuesday, 22 May 2012

9 Months of Nothing!

Soooooooo....

It's been a long, long time since my last post, and even then it was getting pretty slow. Why? Lots of reasons - priorities in RL taking over, new girlfriend, two kittens that seemed to demand my attention whenever I tried to paint, and to be honest, the painting of my first LR in tiny components was taking its toll too - I know it sounds lame, but painting the same colours on 8 intricate Lascannon's was getting really boring. Thus, I took a 9 month break!

But here I am, back again! Not sure how much time I'm going to get to hobby, I now have a fiance who's about to move in and add a third kitten! But we'll see what happens.

I wasn't completely idle though - I bought a new fiance-friendly painting workstation, and I'm slowly getting that all set up and organized. I've built three Apoc army lists to focus my work (you can see them in the tabs on this site), I've built 23 of 3 Force Organization Charts to clearly show the companies everything belongs to, and I've ordered some bits and pieces from Forgeworld to set me up for my next project.

So, the workplan:

- Finish the LR Terminus Ultra...I've never airbrushed before (beyond some testing on internal components of the same tank), I've never painted a tank before (well, I've never finished one), and I'm still not confident on using weathering powders effectively, especially after my mess when I varnished over the mud inside the LR and turned it into ash. But you know what? The best way to gain confidence in all those areas is to bite the bullet and do it!

- Start building 5th Company! I'm going to start with the Chapter Master and Command Squad with their Razorback, and move straight onto 1st Tactical with their Rhino. I've ordered everything I need, and by the time I finish the LR it'll all be in my hot little hands and ready to go.

- Paint something different. I have a squad of Termies, 2 FW DA Ven Dreads, a Thunderhawk, a Warhound, 6 10-man squads of various types, LR's, LRC's, so much to choose from! But I will probably paint the Termies first, along with their LR Crusader, and go from there.

Keep your eyes peeled, there'll be more updates shortly.

To avoid the pic-less post, here's a happy-snap of my new painting workstation - it's a computer desk with doors so I can hide everything away from the kittens (and the fiance!) when I'm not using it. The keyboard tray currently houses my Alienware M17x so it is actually used as a computer workstation too. Neat eh? Now I just need to figure out where I can get some custom-built painting shelves :)

Friday, 19 August 2011

I'm not dead, just busy!

It's been a while since I've posted, and to be honest, between work and home-life my hobby has suffered a bit for the last 2 weeks. I'd like to say this weekend will see a fair bit of progress on my Terminus Ultra, but the reality is that I'm helping someone move out of my house and selling a bike, so I really have no idea.

The desire is there though, that's the main thing :)

I haven't been completely idle though - after spending several hours painting the interior of the tank and experimenting with FW weathering powders, I was surprised (and very happy) with the effect. There's three different coloured earth powders on the flooring, and I even put two tones of rust on the internal doors I modelled that looked great. Then I made a big mistake! For the most part, I've been making a paste out of the powders using Tamiya Thinner as a base, or applying a heavy GW wash on the model and brushing on dry powder while it's still wet. I finally finished it all and was very happy so I did what I always do - applied a coat of Testor's Matt Varnish. BIG MISTAKE!

In the space of 15 seconds, my gorgeously grainy dirt and mud effect turned into a while, flaky ash POS! After I managed to stop crying I tried applying gloss coat over the top (a good solution to the common "frosting" effect when using matt varnishes). This seemed to solve the problem and I breathed a sigh of relief. Then I applied another matt coat (per normal practice) and it went white again! I can't exactly leave rust and dry mud glossy can I? In the interests of wanting to move on, I've left it imperfect and moved forward with building the tank, and will have to experiment more on a test model to figure out what to do next time.

I've posted some photo's below of the interior detailing, along with one of the distractions I've had the last couple of weeks eating a space marine!


P.S. My titan and thunderhawk arrived Monday, and my 88 pots of Vallejo Game Colour arrived Tuesday. Very happy on both accounts, but incensed by the fact that I ordered the FW kit 2 weeks ago (and they cast the resin upon order and ship from England), but ordered the paint 7 weeks ago...

Tuesday, 2 August 2011

I raided Forgeworld!

Ok, so not really, but I did just place a pretty massive order (by my standards anyway). Thank you goes to the Australian Tax Office for paying out my dividends on my forced savings account :P

Here's the shopping list:

- Dark Angels Thunderhawk

- 2 x Dark Angels Venerable Dreadnoughts (one with Plasma Cannon and Missile Launcher, the other with TL Autocannons and CCW\Flamer)

- Mars Pattern Warhound Titan w/ Plasma Blastgun and Vulcan Mega-Bolter


In the meantime, I'm still working on weathering the interior of my LR Terminus Ultra. To be honest, this is probably the only non-transport LR I'm going to bother painting inside and out - I could have completed another Land Raider in the same time it's taken me to mess around with weathering the inside so far...

Friday, 29 July 2011

First Foray into Airbrushing


I finally found some time to sit down and run some paint through my airbrush a few hours ago. This is the first time I've ever used one, so I have to admit I've been a little nervous as I wasn't sure what to expect.

I thought I'd start with something relatively simple for my first attempt - I've spray coated the interior detail of the Land Raider Terminus I've been working on, and decided to paint it Desert Yellow as a base coat.

First off, thinning - to begin with, I decanted the brand new pot of Desert Yellow into a dropper bottle, and cracked open my dropper bottle of Windex (which a number of painters I've spoken to swear by as a thinner - no, it doesn't tint your paint blue!). Since I usually brush-paint with a 1:1 mix of paint to water\flow-aid, I thought I'd start with this ratio as I've read that you want your airbrush paint to have the consistency of milk (which would be thinner than my normal mixes). Well, let me just say that this simply didn't work for me. After filling up the paint cup on the brush with a 1:1 mix and spraying the first piece (the larger roof panel), I found it way too thin to work with - coverage was horrible, exposing black undercoat at every edge, and running the air over the painted piece with no paint spraying out created pretty little explosions of paint as it sprayed to the edge of the piece and beyond.

Right, back to the drawing board. Much mixing and experimenting later, I found a 2:1 paint to thinner mix to be about right. All in all, it took about 30 minutes to airbrush the 8 pieces that comprises the interior. They've been sitting for about 2 hours now and are mostly touch-dry.

That's all for my update for now - nothing terribly exciting, but my first real air-brush experience. I'm looking forward to testing it out in much more depth over this weekend.

Back to undercoating the rest of the tank :)

Sunday, 24 July 2011

Busy Weekend!

So, after waiting almost a week for it to stop pouring, I was able to get the Dullcoat on my Devastator squad to finally complete it.

Let me know what you think :)


I haven't been letting the wet weather completely stop me though, getting to work on my Land Raider Terminus Ultra as soon as I found the time over the weekend. This anti-armour specialist is one of five Land Raiders in an Armoured Spearhead and since it doesn't have any troop carrying capacity I thought I'd use the internal space to model a power generator to feed the massive 8 Lascannon's this beast drags around the battlefield!

After much cursing and finger slicing, I'm pretty happy with the result. The generator is made from the Hurricane Bolter arms of two Ironclad Dreadnought kits, clad with plasticard to hide the asymmetrical shape of the arms they were originally sculted to represent, and adorned with the missile launcher covers and Assault Drill chassis from the same dreadnought kit. The thickest wire I could find in a Bass Guitar String set provides the finishing touch. I'm yet to decide if I'm going to add more wiring - I had originally planned a far more complicated setup, with a number of pieces sitting on the floor in front of the generator, all wired together using thin wiring, then using the heavy cabling to run a wire from the centre to each Lascannon (representing the power feed to each gun). Each of the 12 bolters was also going to be wired into the pieces on the floor. However, I just couldn't jam that much stuff into the small space I had to work with, and I got the impression it would have been way too busy with that much wiring anyway. Will throw on a coat of paint and figure out whether I'll leave well enough alone, though comments would be greatly appreciated.

I also made some plasticard covers for the inside doors to finish off the internal space. I used a sharp needle-tool to etch some rudimentary armour coverings in the visible space to make it look like the same as the doors on the inside of weapons sponsons - it's pretty rough but you'll hardly be able to inspect it closely once the tank is built anyway. I spent the remaining time I had to put as much of the rest of the kit together ready for a primer coat once it stops raining.


Tuesday, 19 July 2011

Airbrushes Away!

So, after receiving my Iwata Eclipse HP-CS recently from Dick Blick, I had another 2 week wait for a compressor - very painful waiting on something you're excited to receive.

After prayers to the Emperor went ignored that it'd arrive on Friday in time for the weekend, what should appear first thing yesterday morning but my brand new Iwata IS925HT compressor! :) I have to say, while the shipping wasn't super-fast (a week and a bit from Adelaide), it was nicely packed and the guy even threw a few lollies in the box (an odd, but nice touch).


Fired it up for the first time last night, and whilst I didn't manage to get any paint through it, initial impressions are that the compressor is surprisingly small, very quiet, and sits conveniently on my painting desk without trying to escape via vibrations when it's filling the tank.

I'll play with it more on the weekend and post some first impressions once I run some paint through it.

In terms of hobbying, I've had a couple of really slow weeks. The Devastator squad is so close to finished I can almost taste it - threw the final Dullcoat on 3 of the guys last night and re-glued the annoying banner on the Sergeant. All that's left now is to put squad-number decals on the Sergeant and the Plasma Cannon marine (again...I hate decals falling off after they are perfectly placed!), then Dullcoat them. Once they're dry, 10 minutes, some PVA glue and some static grass should see them finally completed.

Then, on to my custom generator build to go inside the Terminus Ultra :D