Monday 30 January 2017

Eliza finished, on to Raythen

So, it's been a few weeks since my last post. Whilst I've been painting here and there I've been struggling against the weather that seems hell bent on pushing past 40C as often as possible (that's 104F for anyone reading from the US).

Anyway, I've finished up Lady Eliza Farrow, highlighting her hair with a Gold Yellow:Moon Yellow mix, then pure Moon Yellow, and finally Moon Yellow:White mix. I also finished up the cup with bog-standard Gunmetal -> Chainmail -> Silver.

Finally, I ducked into Games Workshop and grabbed some wash (I just can't seem to get my homebrew to flow properly) and picked up some Blood For the Blood God from their technical range hoping it'd add a bit of depth to her blood trickle. Nope! I seriously can't tell the difference. Oh well, she's done now so nothing to complain about. I'll take some better photos later, but here she is complete:


And on to Raythen, the hero version. One of my friends plays a Dwarf Ranger in our D&D campaign, so it was a pretty natural next choice.

So far I've managed to block out colours with a basecoat, so it'll be on to washes next. Here's the colour palette so far:
Cloak: VGA Goblin Green
Trim: VGC Mutation Green
Skin: 1 VGC Tan : 1 VMC Basic Skintone (3T)
Boot Guards: VGC Scurvy Green
Pouches & Pants: VMA Camo L. Brown
Rope & Axe Grip: VGA Dead Flesh
Gloves, Crossbow & Bracer: VMC Chocolate Brown
Beard, Belt, Boots & Axe Haft: VGA Charred Brown
Wrist Band: VMA Mahogony
Gold Trim: VGA Glorious Gold
Metal: VGA Chainmail Silver

As you can see from the photos below, lots of natural colours and quite a complex palette. Beyond blending the cape up to quite a light yellow-green, I'm planning to integrate most of the palette via a brown wash, but we'll have to see if it works.


Anyway, it's coming together and I'm quite pleased with the colour scheme. Will post again once he's had a thorough shading via washes. Until then, Happy Hobbying!

Friday 6 January 2017

WIP: Lady Eliza Farrow

Back again with an update, this time of Lady Eliza Farrow. She's been sitting on my work desk for almost a year with nothing but a primer coat on so I thought it was high time she got some paint on her.

There's not much to her, apart from a pretty bad sculpt - one hand is basically just a blob at the end of her sleeve, the other grasping the cup looks like her fingers are way too long, her nose melds with the cup where they meet, and where her hair falls on her neckline separating her dress from her face from behind, it's a solid wall of what looks like a mould line from the front.

Oh well, she still deserves a solid paint job. As you can see below, it's a work in progress, but I've focused all of my attention on her dress to start with. In the box art she's wearing what looks like a steel skirt, ranging from neutral grey shadows to white highlights. I looked around the internet for inspiration, and decided to go with a blue-shaded white dress instead as it looks prettier and presents a more pronounced contrast to the fact that she's drinking blood from a cup!

I wanted a very smooth blend from VMC Sky Blue to White, so I started with an airbrushed basecoat of VMC Sky Blue:

The skirt was then blended using lots and lots of very thin layers, as follows:
1) 2 VMC Sky Blue:1 VGA Deadwhite:3 Thinner
2) 1SB:1W:2T
3) 1SB:2W:3T
4) 1SB:4W:5T
5) 1SB:6W:7T
6) 1SB:12W:13T

Each colour was painted in between 4 to 7 layers, and whilst it took a while to see any real difference, the 4 hours of patience paid off. The ruffles were simply painted with the mix from step 6 above, minus the thinner to ensure it didn't flood the crevices.

Here's the final skirt:

Then I moved on to the skin. I found this significantly harder to blend well due to the cramped location and my lack of skill. My colour process was as follows:
Base) 2 VMC Basic Skintone:1 Thinner
Shade 1) 1 BS: 1 VMC Beige Red: 3 Thinner
Shade 2) 1 BR: 2 Thinner
Shade 3) 1 BR: 1 VMA Gold Brown: 3 Thinner
Shade 4) 1 Med. Camo Brown: 3 Thinner

At this point, I just couldn't get the shadows to work the way I wanted them to - the cleavage looked fine, but I really wanted to define a cheekbone line without being heavy handed. Anyway.

Highlight 1) 1 BS: 2 Thinner
Highlight 2) 1 BS: 1 VMC Light Flesh: 3 Thinner

I didn't really want to keep shading further as it just wasn't working for me, but I did want to add more of a pinkish tone to her skin, so I mixed up 2 Beige Red with 1 Scarlet Red (and 3 Thinner) and applied it almost as a shadow to her cheeks. Whaddayaknow, it did a much better job of defining the cheekbone and shading than my previous 4 layers! Still not perfect, but much better.

I added some VMA Ferrari Red to represent blood, and moved on to the hair.

So far, I've started with a VGA Bronze Fleshtone all over, then I mixed 1 VGA Gold Yellow with 2 Bad Moon Yellow and 2 Thinner and gave it a solid coat (the basecoat was really to get rid of the blue overspray from the air-brush). I've also now darkened it slightly with Citadel Gryphonne Sepia wash.

Finally, I've covered the cup in black followed by a dark base of VGA Gunmetal. Here's how she looks right now:


I'm really happy with how she's turned out so far, particularly the blend on the skirt. Next up I plan to blend from a mid-golden brown to a very light blond for the hair (hopefully blending individual strands to maintain definition between them), and finish the cup obviously.

Until then, Happy Hobbying!

Wednesday 4 January 2017

The Queen is dead! Long live the Queen!

So, while I've been chipping away at Long, I've had Queen Ariad in her human form (so, technically just Ariad) staring at me in a sad, half-painted state. I had such grandiose plans for her!

The box art seems to intimate that her bodice is quite a red/brown at the top and fades to a darker purple as it progresses downwards. So, a long time ago when I had my airbrush out for something else, I smoothly transitioned from a 50:50 mix of Scarlett Red and Mahogony at the top through Hexed Lichen and finally Imperial Blue at the bottom. The blend was hellishly smooth (that's why I love the airbrush) and the top part looked fantastically warm and red and the bottom cold and blue/purple, but the middle colours always bothered me - they just looked...muddy.

Anyway, I continued regardless. To tie the bandages back into the rest of the mini, I basecoated them in a Hexed Lichen and Wolf Grey mix that produced a nice rich lavender colour (1:4 from memory), then drybrushed over it with Wolf Grey, and then Wolf Grey with a touch of white.

Then on to the gold - there's an extremely fine spiderweb pattern modelled into her bodice, so I set to carefully painting all of this pattern in Glorious Gold, along with her head and the backpiece. Except the modelled spiderweb was either moulded so delicately, or my airbrush painted over it too thick, so as to make it impossible for me to get a smooth gold line on most of the pattern that I could see. Or perhaps it was just a lack of skill.

Finally, I set to highlighting her dress/cloak. Unfortunately, as I had blended using the airbrush, trying to highlight an extremely fine series of folds required me to continuously blend a highlight colour. It just didn't work.

By this stage I was seriously unhappy with how it all looked, and I could feel it sucking my painting motivation out of me. I set the miniature down, took a photo, and walked away from it to clear my head. Sitting outside with a coffee, I looked at the photo (below), and saw this:


1) The bandages looked horrible (I hate how drybrushing looks most of the time, but this was worse than I've seen in a while)
2) The highlighting on the dress/cloak looked horrible. There was a bright blue streak on one section, but you could hardy tell the rest was even highlighted
3) The gold spiderweb was horrible! Nuff said
4) There were obvious mould lines everywhere; on her arms and legs especially. On finely detailed elements like the bandages I think this is inevitable to an extent, but the drybrushing really brought all this out and made it more obvious.
5) Perhaps worst of all, I hadn't really noticed how chunky the paint looked in sections. The gold backpiece and parts of her skirt had visible lumps on them, and the holes in the backpiece were irregular and poorly cut out.

I knew immediately there was no saving it. I've considered it a couple of times, but for the first time in 20-odd years of painting, I ordered another copy of the miniature. I could have repainted her, but my crappy prep and blobby paint just couldn't be fixed to a point I'd be satisfied. Better to start with a fresh copy and make brand new mistakes with that one.

I'm not quite up to binning the old copy yet - because I don't care anyway, I experimented with something I should have just done but didn't want to risk it; I cut the backpiece off. This confirms that when the new copy comes I can do the same and have a much easier time painting both it and her back. I'm also going to try painting the bandages in pure Wolf Grey, then washing with purple to see if I get a cleaner effect than drybrushing.

So, Queen Ariad is dead. But a new copy is on its way, and I'll move on to something fresh and new in the meantime.

I've got both Lady Eliza Farrow and two Merriods sitting on my desk ready to go - I plan to work on them in parallel, but I'll post progress separately soon. Until then, happy hobbying!

Monday 2 January 2017

It's been too Long!

So, it's been a couple of months since I last posted. For a nice change, that's not because I haven't been painting, though I did slow down due to the excruciating heat of Australian summer until I bought a portable air-con unit. It's made an absolutely huge difference, and I'm hoping that means painting won't have to be a winter-only hobby anymore as a result.

I haven't posted because I've been working on a secret project for one of my best friends to use in our D&D campaign.

After starting with a Dragonborn Barbarian, Big Dan decided his chosen personality wasn't quite washing well with the rest of the group, and since he'd been talking about inventing a Witcher class since we first started, we both decided it would be a perfect time to roll one up. Then we hatched a devious plan...we wouldn't tell the group what was going on until it unfolded in-game, so it'd be a complete surprise when his old character announced (at the grant old age of 4th level) that he was retiring from adventuring and staying in town. Needless to say, it was a shock to everyone, as was the poor NPC they'd been rescuing turning into Big Dan's new character. Loads of fun!

We wanted a miniature to represent the new Witcher character, and Big Dan wanted something pretty close to the characters from the novels and video games with the same names and preferably with a reference to wolves. Nothing from the Descent range suited, so we started searching online for something that would, and we quickly came across this:


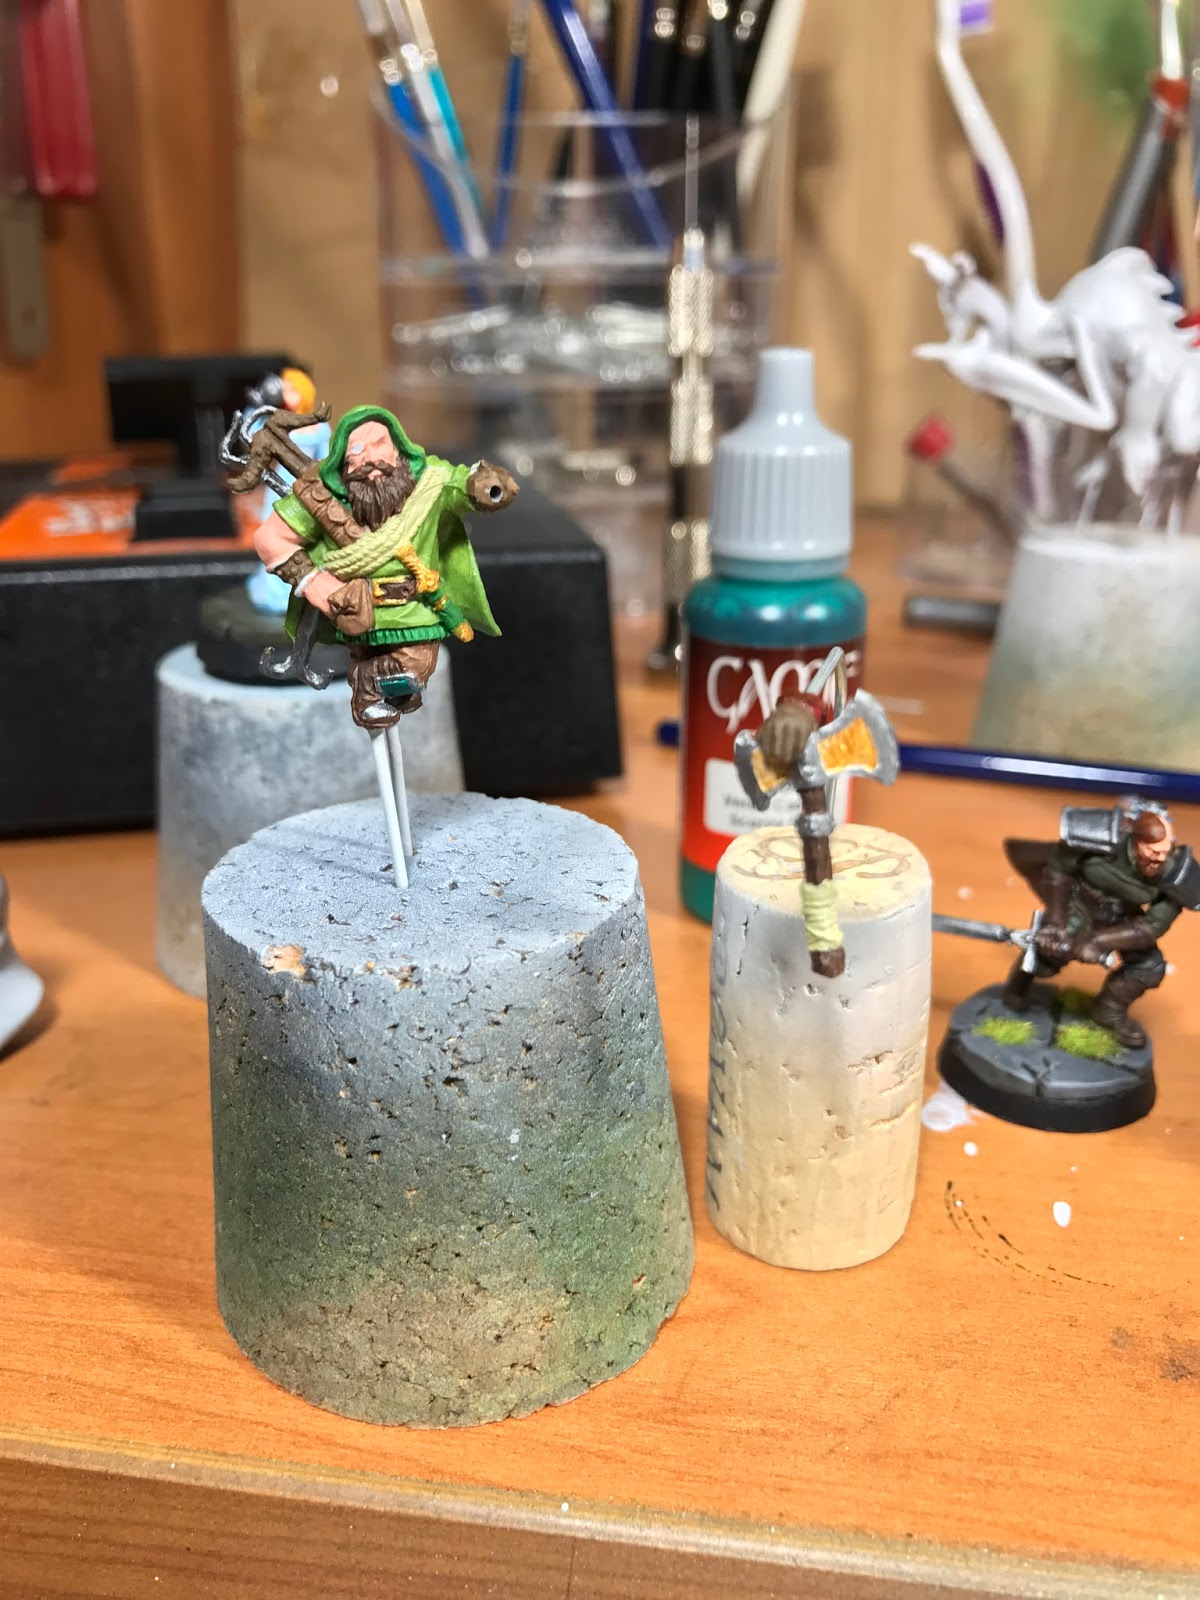
Imperial Wolfbane Commandos from a science fiction game called Warzone Resurrection. Without making any promises of success, I quickly ordered them and set to converting the mini that most closely represented what we were looking for. It didn't take much - I simply cut off the designs on the chest and shoulders.


Now for some paint. Here's what I used:
Pants: 1 CG:1 B:2T, highlighted with CH
Chestplate and tunic: 1YO:1T, highlighted with successive additions of VMA BW
Cloak & Gloves: VMA BU, followed by 3BU:2CLB:3T, and finally CLB for extreme highlights
Belt & Boots: VMA CB followed by a drybrush of VMA BB
Face: VMC BR, then I kept added VMC BS until it was pure for highlight layers
Eyes: GY, edged with BMY
Wolf Pelt: For the wolf pelt, I wet blended bands of VGA DW, SWG, SG and B, from white where the wolf's underbelly would be through to black along its spine. I then highlighted with a light drybrush of SWG
Shoulders and Knee-guards: I started with a base coat of VMA DM, then lightly highlighted with VGA S.
Sword: Starting with a VGA CM base, I made two glazes to darken and highlight on opposite sides of the sword according to where I thought the light would fall, as follows:
- Shade: 1 VMA DM:2B:12 Glaze Medium
- Highlight: 1 VGA S:12 Glaze Medium
I then used these in about 10 coats each to slowly blend in the shadow and light.

Here's the final miniature, which I actually found the time to properly photograph for a change:


All in all I'm really happy with how he turned out. There's a few things that still bother me, which I may fix up at some point - his sword didn't come out the way I would have liked, and it's bent to boot (more on how to fix that in a future post). Looking at the photos, I need to check the wolf's eyes too - I don't remember it looking wrong on the mini, but the photo above makes it look like his upper eyelids and brow are yellow! I had also planned to paint his cloak using a VMA Mahogany base instead of Burnt Umber, but I mixed up the paint pots in one of many thin base coat layers and it was impossible to fix it without repriming the cloak. Oh well.

Anyhoo, was an interesting miniature to paint. I particularly liked how the wet-blend on the wolf pelt came out, along with the two-brush blend on the cloak and gloves.

Well that's it for now - I've got 4 more miniatures on my workbench right now, plus two more custom minis for my D&D crew, so expect more updates soon. Until then, happy hobbying!

Note: Unless otherwise specified, all paint is Vallejo Game Colour.
Paint codes used:
VGA - Vallejo Game Air
VGC - Vallejo Game Colour
VMA - Vallejo Model Air
VMC - Vallejo Model Colour
CG - Cold Grey
B - Black
YO - Yellow Olive
BW - Bonewhite
BU - Burnt Umber
CLB - Camo Light Brown
CB - Charred Brown
BB - Beasty Brown
BR - Beige Red
BS - Basic Skintone
GY - Golden Yellow
BMY - Bad Moon Yellow
DW - Dead White
SWG - Stonewall Grey
SG - Sombre Grey
CM - Chainmail
DM - Dark Metal
S - Silver
T - Thinner (10 Water : 1 Flow-Aid)