
Based on my last post, there's a few major goals I'm working on that are fairly symbiotic in nature - I'm not only trying to figure out what paint colours to use, but how to use them effectively through an airbrush. To that end I've devised an initial set of experiments. I shall continue to post as I progress, hopefully at the end of it I'll have a paint scheme and technique I can actually use to paint my army!
Glossary:
- AB = Airbrush
- VGC = Vallejo Game Color
- VMA = Vallejo Model Air
Experiment A: Bone-coloured Robes
Goals:
- Determine what colours to use to paint bone. Initially, the robes the DA are so fond of.
- Determine what thinning, pressure, nozzle size is required to paint each stage with
Background:
Watching videos on YouTube, especially from BuyPainted, the plan is as follows:
- Undercoat in Vallejo Grey Primer
- Base coat with VMA Sand (Ivory)
- Using an AB, build a blended shadow colour in the folds of the cloak with VMA Sandy Brown
- Using an AB, build first level of base\highlights with VMA Sand (Ivory)
- Using an AB, build second level of highlights with VMA Sand (Ivory) : White 50:50
From the videos, the shadows are achieved with a single fine stroke from the airbrush very close to the model directly into the folds of the cloak. Looks very difficult.
Day 1:
Ok, so I started by throwing caution to the wind and starting with the Bolter Marine from Command Squad Ecanus...after undercoating and base-coating in Sand, I went in with the airbrush at 20psi, loaded it up with Sandy Brown, and promptly coated the entire cloak in the shadow colour in one big mess. Result: Fail!
Clearly I'm going to need to tweak something...after getting some vague advice from BuyPainted (i.e. he keeps his pressure constant but thins his paint to the correct consistency for the task at hand, although he didn't indicate what that pressure might be or a good thinning ratio to work from).
It's time to experiment! I painted 6 older metal Dark Angels Marines with Robes as follows:
1) Grey Primer undercoat, applied with my 0.35mm Iwata AB
2) Sand base coat, applied with my 0.20mm H&S Evo AB @ 20psi with no thinner
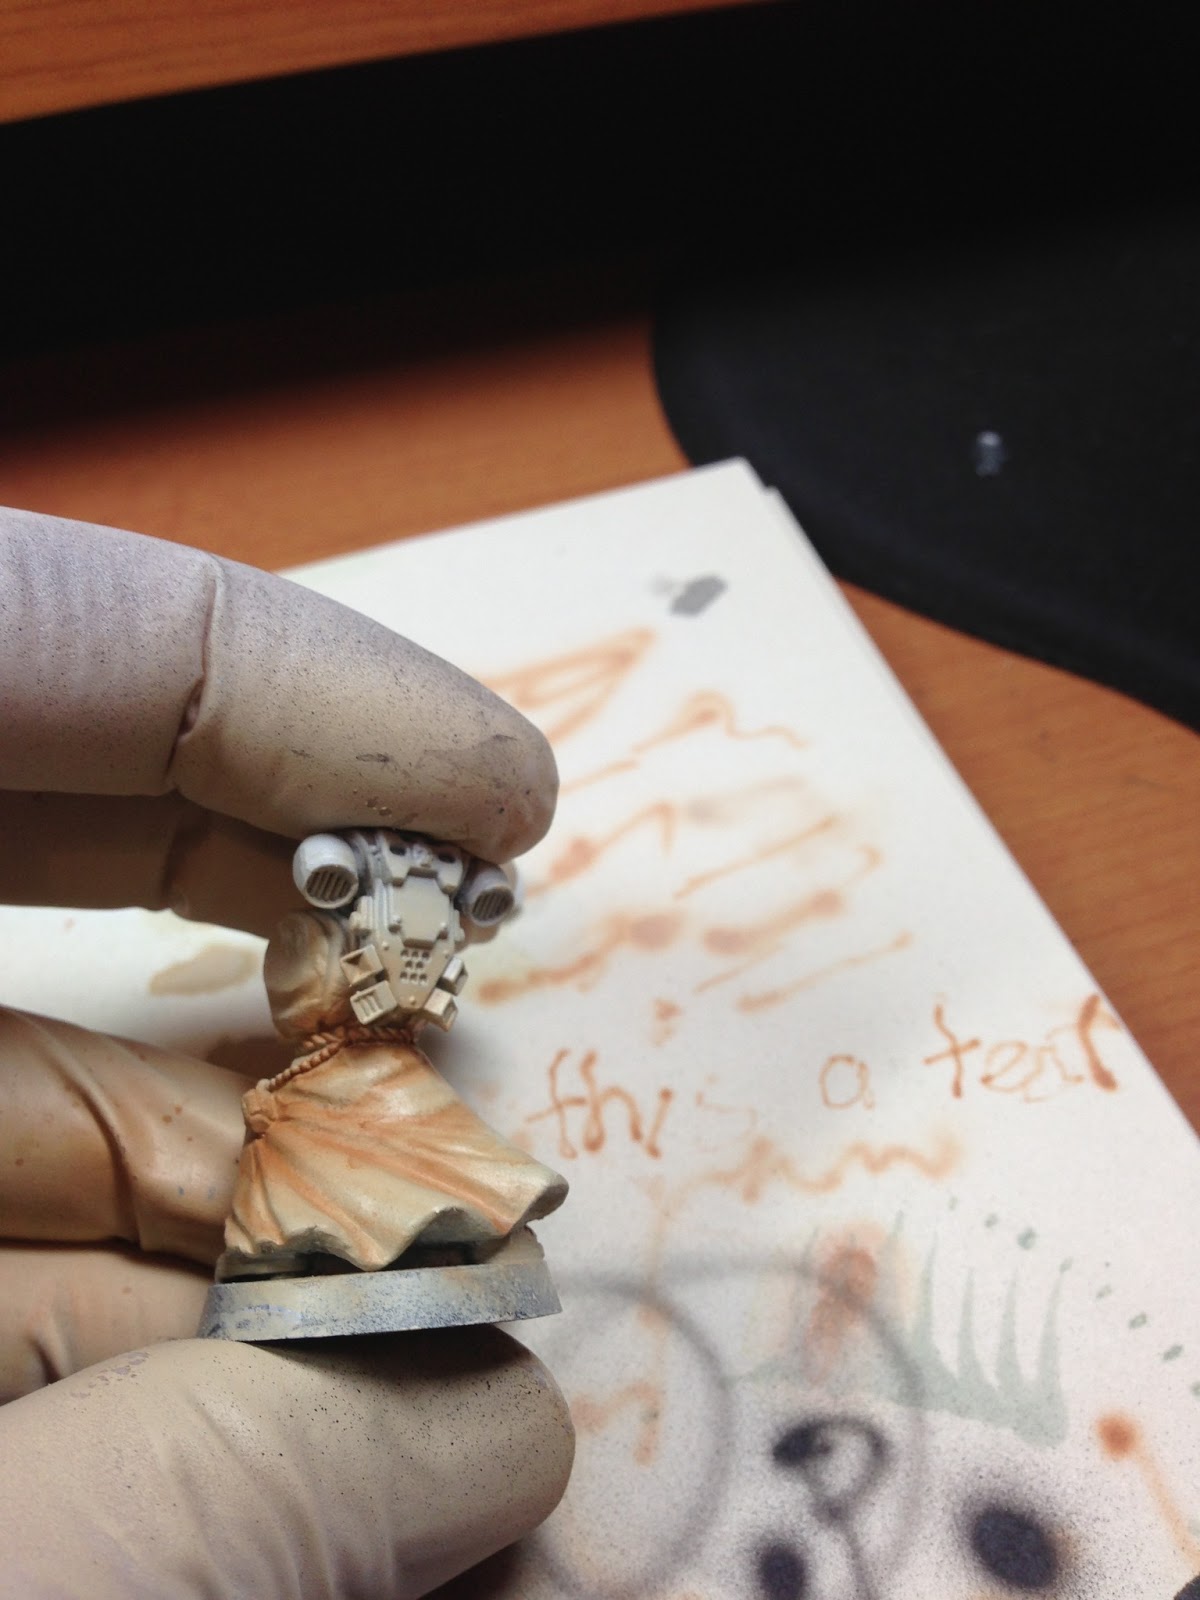
Here's the line-up prior to the next stage, you can see the identifying numbers on their base:

3) I then proceeded to paint the Sandy Brown shadows on each marine, changing my pressure and thinning each time to try to find the right balance. All thinning was achieved via Vallejo's Airbrush Thinner (new formula) and mixed directly in the cup with a crappy old brush (I need to get myself a mini spatula!). All stated ratios are paint : thinner, and I used my H&S Evo with 0.20mm nozzle
The results were as follows:
- I) 1:10 paint @ 15 psi - basically came out as a wash, blowing the paint around horribly, pooling, and the colour itself wasn't nearly deep enough. More like a really difficult to control tint, if anything. You can also see where I used my finger to remove the darker colour on the raised sections of the robe - a process I feel would have been far more effective had I bothered to wait until the base coat was completely dry...


- III) 1:5 paint @ 10 psi - this provided a slightly better result, producing a good broad tint that didn't overpower the underlying colour too much. The problem was that it was still too thin to get a fine line.


- IV) 3:10 paint @ 10 psi - this mix was far more controllable, allowing a much tighter line, but still too thin to prevent pooling and spatter when AB up close and personal to get better line control.


- V) 2:5 paint @ 10 psi - I felt that this level of thinner was pretty much perfect. It allowed me to start to get fine lines whilst providing broad enough coverage to achieve a decently smooth blend.


- VI) 2:5 paint @ 5 psi - just for shits and giggles, I lowered the pressure again. This gave me really, really tight control over the lines where I felt the only limiting factor was my skill at knowing where the paint is about to come out of the brush before I hit the button.

Next Steps:
Still a fair way to go on a final blueprint for bone coloured robes. The next step is to go over marines V and VI with Sand to bring back out the base colour on the raised sections, before proceeding to the highlighting stages. I'll start with the same ratios and pressure settings of 2:5 and 7.5 psi, and if I can't find a good balance between the two practice marines I'll redo the other 4 based on what worked for Sandy Brown to give me more troops to practice highlighting on.
Closing Thoughts:
As far as I'm concerned, the experiment was successful at delivering a workable solution - if I mix my Sandy Brown layer at 2:5, and run between 5 and 10 psi, I get a controllable and fine line. I think the only thing that will improve this now is practice and steady and fast hands, and improved AB accuracy.
Experiment B: Dark Green Marine Armour
Goals:
- Determine which paints to use to deliver a fairly close match to the original Dark Angels Green scheme I was using
- Determine what thinning, pressure, nozzle size is required to paint each stage with
Background:
Again, from BuyPainted, my plan is as follows:
- Undercoat in Vallejo Black Primer
- Apply a horizontal highlight in Grey Primer
- Apply a top-down highlight in White Primer
- Base coat with VMA Olive Green (?)
- Highlight (unknown colour), again using the top-down zenithal highlighting method
I've never used zenithal highlighting, and I'm keen to see how effective the pre-highlight stage turns out to be on the base green colour. Note that I'm not convinced that the suggested VMA Olive Green is going to deliver the right tone I'm looking for, but I won't know until I paint it on the marine and see for myself. The other alternative is VGC Dark Green, which is Vallejo's answer to the older Citadel Dark Angels Green. I've had major issues with coverage of this colour in the past (as recorded on my blog), but I've now got 2 more pots of the same colour from two different vendors in the hope I just got a bad pot. So, grabbing a spare marine (I have surprisingly few "spare" marines), off we go on another experiment.
Day 1:
Right, so, we undercoat black, then just spray some grey from the sides right? If only...
1) Undercoat in Vallejo Black Primer (Iwata 0.35mm) @ 20 psi - check
2) Horizontal highlight in Vallejo Grey Primer (Iwata 0.35mm) @ 20 psi - FAIL!
Here you can see the result - spraying from about 6" away produced a really dusty, crappy, orange peel effect with bright flecks of colour for good measure. Yuck!


Take 2...
1) Undercoat in Vallejo Black Primer (Iwata 0.35mm) @ 20 psi - check
2) Horizontal highlight in Vallejo Grey Primer (Iwata 0.35mm) @ 15 psi - FAIL AGAIN!
Seriously, twice in a row? Same result too...


Next Steps:
After I finish wanting to hit things, I plan to try two other methods to get what I thought would be a darn simple coat of grey paint:
a) Try it at 10 psi, up closer so I can control coverage
b) Try using VMA German Grey instead. I know this sounds odd, but I took a screenshot of BuyPainted's video at the point where he held up the marine with grey horizontal highlights and while he said he used Grey Primer, it looks much darker than that to me. Perhaps a thinned VMA colour will help with the orange peel too, who knows? I guess I will after I experiment :)
Closing Thoughts:
The less said, the better. I expected to struggle with where the paint went if anything, certainly didn't expect to have to struggle to get an even coat on...
Experiment C: Dark Green Tanks
Goals:
- Determine which paints to use to deliver a nicely shaded and highlighted tank in the same Dark Angels green scheme as my marines (which may not necessarily use the same paints)
- Determine what thinning, pressure, nozzle size is required to paint each stage with
Background:
So there's a few different ideas rattling around in my head, and I'm not sure how to proceed as yet. It's listed on this blog post because I've started painting the interior of Command Squad Ecanus' Razorback in preparation for a coat of paint, and I need a reasonable method planned out pretty soon as a result.
Firstly, I plan to use my poor old Rhino from previous posts as a testing bed for my ideas. Just need to dig it out of the graveyard and give it a good solid black undercoat.
Here's some thoughts on how I might approach it, still yet to solidify them:
Method A: Pre-shading \ Pre-highlighting - I've seen a bunch of videos that start with a grey primer coat, then pre-shade panel lines with black and pre-highlight edges with white. Then they spray a number of light coats of the base colour and end up with all the hard work pretty much done. The thing is, I'm not certain how I can apply this method when my base coat is black already...maybe I'll just try the edge highlighting in grey and go from there?
Method B: Standard base coat, shade & highlight - Alternatively, I could simply start from a black undercoat, apply an even coat of green, then use a darker mix for panel lines and shading, and a lighter mix for highlights.
Method C: This idea integrates with either A or B, so will probably be included no matter what...either paint the whole model in a slightly darker shade of the base colour, then lots of thin light coats of the base colour, leaving a smooth transition from the bottom of the tank side to the top (where it's completely covered with base colour), or paint the whole tank in the base colour and manually paint in the transition with the darker colour.
As you can see, there's a few permutations of those thoughts. Some time in the next few sessions I'll probably just pick a combo and give it a go on the test tank, and document my findings. Not sure what else to do but play around with the ideas until I'm happy.
Well, that's it from me for now. A long post as a welcome change from a year of no posts. Hope someone in the ether finds it at least mildly interesting :)
No comments:
Post a Comment